Category Archives: knitting
Hummingbirds, Knitting and Creativity
I love how the creative process gets the mind working and ideas keep popping up, some of which actually turn out to be useful!
I have a new knitting project on the go which I am very excited about. This is my own design and I have been playing around with it for a while. It all started because a friends Mum asked if I could make her a pair of speciality gloves. She needed to have warmth as well as dexterity. I must admit I thought it would be very simple to do! just adapt a glove pattern and we are good to go….well that is mostly true, but I needed to factor in specfic measurements. Well I have made a few proto types and I think we are on our way to designing something worthwhile, more on this soon.
Now for something quite different, here in South Western B.C we have a hummingbird that stays all winter. That just amazes me, we have had surprisingly cold weather lately and this little bird will start nesting in February…brrr. The hummingbird is the Anna’s and here is some information about them from the Cornell Lab of Ornithology:
Anna’s Hummingbirds are among the most common hummingbirds along the Pacific Coast, yet they’re anything but common in appearance. With their iridescent emerald feathers and sparkling rose-pink throats, they are more like flying jewelry than birds. Though no larger than a ping-pong ball and no heavier than a nickel, Anna’s Hummingbirds make a strong impression. In their thrilling courtship displays, males climb up to 130 feet into the air and then swoop to the ground with a curious burst of noise that they produce through their tail feathers.
 This is the male Anna’s, isn’t he just spectacular! The female Anna’s has a stout body with short, straight black bill
central iridescent pink throat patch Some females show several scattered pink feathers on face. White above and behind eye.
We have a hummingbird feeder ( seen in the above pic, Anna’s female is on it !) in our garden and have such pleasure from seeing two of these wonderful birds daily. They are quite fiesty and do not allow each other to drink at the same time. By the way the sugar water solution for these birds is one cup of boiling water and 1/4 cup of plain white table sugar. Mix up and allow to cool before placing in your feeder. DO NOT ADD FOOD COLOURING to this….it is not good for them. Also do not change the ratio because you think they may need more sugar, it can be hard on their kidneys and could kill them. The sugar solution should be changed regularly I clean my feeder out once a week in the cool weather and twice a week in the summer. We have the Rufous hummingbird here in the summer more about them later.
Have a lovely day and take time to enjoy the small things 🙂
Felted Wool Birds Home Decor Valentine Gifts Eco Friendly Height 4″
Felted wool birds are the latest items in my repertoire. I am having lots of fun making them, I use Merino wool roving in a variety of different colours. Sometimes I add silk threads or maybe a little tussah which is a fine silk mixed with wool, it adds a lovely sheen to the item.
I also use some of my knitted UFO’s you know the ones …unfinished objects ! I felt them, then create a small wool bird from the felted fabric. I stuff some of them with polyester fibre fill and others I stuff with pure wool. Many of the wool coats and sweaters that I have purchased from the thrift stores make great birds, I even dye the fabric to make it more interesting.
What I love most about them is that no matter what I use to create them they all have their own character, sort of like our children. But I am not selling my children to-day ! Just wool felted birds. I do hope you will take a look at by bird family on etsy. More will be along soon.
Wishing you happy creating with love, remember Valentines Day is just around the corner and a little bird friendly company maybe the perfect gift.
Thank you
woolbrain
Market Bag- Alabama Studio Style
Here is my own design of the lovely market bag from the wonderful Alabama Studio Style Book by Natalie Chanin. I love the designs from this book and the previous one, aptly named Alabama Stitch Project.
The work is slow and therapeutic and uses old gently used cotton t-shirts. I had originally thought I would be making the skirt from the first book (ASP) when I designed this stencil pattern. But on closer inspection I decided that the pattern for the skirt would not fit me! So the fabric with the stencil painted on languished in the corner of my sewing area for a REALLY long time! Finally I hauled it out and planned a market bag shape and used the sewing instructions from the second book (ASS)
I will have used three t-shirts in total, one turquoise, one pumpkin with a Pennsylvania logo, and one for the lining. At this time I am not sure what colour I will use for the lining but I am leaning towards green, always one of my favourite colours. I do have leftover turquoise pieces from the skirt but I would have to piece them as I did for the front of the bag and I would rather not have to piece the lining, you will have to wait and see what I do! I still need to make handles for the bag BUT I am almost finished. Just a little note about thread, I used jeans thread which comes in a lovely array of colours, it is polyester and is made by YLI corp and comes in 200yard / 180m spools and is called Jeans Stitch.
As you can see from the photos I also made a hat band in the same method using small scraps of leftover t-shirting. I think the process so far as taken me about a month. But I also knit in between!
I have knitted up a green shrug to go with my blue dress that I made a little while ago. I didn’t use the Alabama style completely for the dress. I did however use the spiral designs in green and the rosebud stitching and I added pewter grey beads around the swirls. I am hoping to add more spirals and stitching to the dress before I wear it again. The shrug came about because the dress is sleeveless and I sometimes need a little extra warmth. I had thought I would make just a pair of knitted long sleeves but it morphed into a shrug. I have to say it is very cosy.
Side to Side Knitted Cardigan
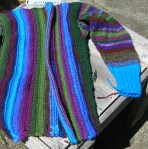
At last I am wearing my creation. Although with all the work and effort I am a little dissatisfied with the end result. I really do believe that I enjoy the process far better than the results. Funny ‘eh!
I know that there are things I would change, for example one sleeve is slightly longer than the other and the same goes for the front bands which I knitted in moss stitch. I think if I knitted the front bands with a slightly smaller needle then I would not get the “drag or pull” on the front. The reason the sleeve is longer is that I knitted one sleeve separately because I wanted to be sure I had enough of the different yarn choices included in it. I should have transferred the knitted sleeve stitches again as I added it to the last side. Instead I just joined it on with a three needle cast off. Experiments….that’s what this is all about.
The cardigan is lovely and warm and I love the colours. I used two yarns that I would not use again or better still I should have used doubled, they were to thin on their own. I love the moss stitch collar front bands BUT not the way it drags downwards. On my next one I will change this part of the design and only use the moss stitch for part of the collar and front.
I look forward to the next one or even two !
The many yarns that I used in this project : Cascade 220 Heathers and Plain. Chunky Mochi by Crystal Palace Yarns. Ella Rae Classic. Patons Classic Wool. Ultra Alpaca from Berroco. Tekapo Pure New Zealand Wool by Ashford.
Have you knitted anything similar? do you have any helpful suggestions?
De-Stashing Yarn A Knitted Project
My latests de-stashing project is a knitted cardigan using various odd balls of yarn. I used to buy yarn one ball at a time, I would see something great and think OH! goody what can I make with one ball from this gorgeous colour. Also it was affordable BUT not very economical or smart. Nevertheless I have a few balls to use! so begins my side to side knitted cardigan. I have admired other knitted side to side projects that I have found on Ravelry and thought surely I can do this too ! I have knitted from the top down, making a sweater with Barbara Walker’s helpful guidance. So I felt sure I could use a little help from Debbie Bliss to make my side to side cardigan. This is it so far…
I am surrounded by these colours in my world…the greens of the garden, the blues from flowers, sea and sky and the purples from the flowers in our garden.

Are you inspired by your surroundings ? what have you made ? would you like to share ?
Free Tutorial:Recycled Felted Sweater Purse
I basically draw out a shape on paper that I think will work for a felted purse, I sometimes cut out a cardboard copy of this if I think I will make more than one.
Then you need to find a sweater of your choice from the thrift store…go for 100% wool whenever possible they felt up a lot better than other types. Take this cool find to your washing machine and do all the things you have been told not to do to wash your wool sweater! Hot water, lots of soap and agitate! when you have done this rinse out the soap using cold water, spin and place in the drier…this should now be a few sizes smaller ! and felted. Once your sweater is felted you can cut open the seams, now you have your working fabric. Your decision as to where to place your pattern happens now. Choose a part of the design you like and see how it will look folded or turned the other way. When you are happy with your choice, cut out and hand sew the side seams. I use strong buttonhole thread which comes in a mass of different colours.
I use an easy envelope style flap on the front of the purse. This design lends it’s self to a few variations, make a point like a regular envelope, angle up to the left or right side and round out the point as seen in the pictures. I sew on a large snap closure making sure to sew a small piece of felt underneath each part of the snap. This gives stability to the closure. Decorate the top if desired, I used a knitted, crochet and felted flower with two wool leaves. You could use recycled buttons, embroidery, loops, lace or whatever comes to mind. Let your creative juices flow.
If you are unable to find a wool sweater try making a swatch from your many scrap pieces of yarn. The multi coloured purse with the gold coloured flower was actually a test swatch that I made to see if I could knit with two yarns. I knitted in a round and found that the join looked kind of nasty so I decided to felt it. After this I cut it open were the join was and TA DA! a lovely working fabric to design with. If you need to flatten it out, just use an iron on hot and steam for a few seconds.
I love the versatility of this project. I am sure that I will be making more. I hope you will give this a try and if it helps.. you are making an eco friendly project by saving sweaters from the land fill.
Happy Knitting
Free Tutorial On Knitting And Felting A Small Decorated Purse
January 2011 More Knitting and Felting from Woolbrain
This year I would like to share a little more of how I make the things I
do so for my first item I have chosen my felted change purse. This, of
course, is not its only use as it can be used to carry an i Pod or cell
phone, cosmetics, knitting paraphernalia, guitar picks and strings or
woodwind instrument reeds. Perhaps the most popular item to place inside
is a gift card for a friend or colleague therefore giving two gifts in
one! Each purse can be personalized to suit the recipient.
How to make a knitted and felted purse with a zip closure.
The body of the purse is knitted either flat or in a round with a yarn
that is 100% wool that can be felted. The felting process is quite simple
and involves your washing machine and some laundry that needs a good hot
wash. I always place my felting items in an old pillow case and fasten the
end with an elastic band. Load the washing machine with the laundry and
filled pillowcase, don’t forget to add the soap and make sure it is on the hottest wash cycle then set the timer for ten minutes.
Using rubber gloves, remove the pillowcase and take out the purse to gauge
the felting. Some yarns take longer than others to felt so setting the
clock for ten minutes helps achieve a perfect piece. Experience will make
this task easier and quicker. The trick is to not make the purse too small
by leaving it in the hot water for too long!!
Once the felting is to your liking remove from the washing machine and let the washing cycle continue with the laundry. Rinse the purse in warm water and re-shape it as necessary.
Let it air dry on a flat surface, making sure it keeps its shape. Avoid a
rack or ridged surface as this can leave an imprint on the purse.
When the purse is dry, hand sew in a colour co-ordinated zip using two
strands of strong buttonhole thread. Now is the time to decorate the
outside, if you wish to do so. Choose a suitable cotton lining; I have
several fabric scraps from which to choose as only a small amount is
needed. Measure the purse and add about a quarter inch seam allowance plus
a little more for the top edge. This extra seam allowance allows the
fabric to stretch around the corners at each end of the zip. Cotton
fabric has a little give in it and so this works quite well however
t-shirt fabric works very well and because it has more stretch, does not
require the extra seam allowance at the top edge.
If you require an inside pocket, add this before sewing up the side seams.
A bottom seam can be avoided by folding the fabric along this edge thus
making a long rectangular shape. Adjust the lining to fit the purse and hand
stitch it in place, just above the zip stitching making sure that your
stitches do not show on the outside of your purse.
Ta Dah – your purse!
Although this picture shows the flowers on the table at this point they SHOULD be securely sewn to the outside of your purse.
I hope this helps those of you who would like to make your designer purses
for carrying small items from cell phones to jewellery. They are lots of
fun to make and give as gifts. Adding beads and trims will make each one a
designer original.
New Year 2011
Thank you for your support this year and continue to keep being creative whatever you enjoy doing.Wishing you all a very healthy, creative and peaceful year for 2011.


